
Celebrating your upcoming marriage means pulling together every detail that makes you unique as a couple. Incorporating your shared beliefs into your ceremony is one of the best ways to do this. You’ll want a chuppah for your traditional or modern Jewish wedding, but you don’t have to worry about overspending to arrange one.
Making one yourself is a mitzvah that brings something heartfelt and handmade into your wedding ceremony.
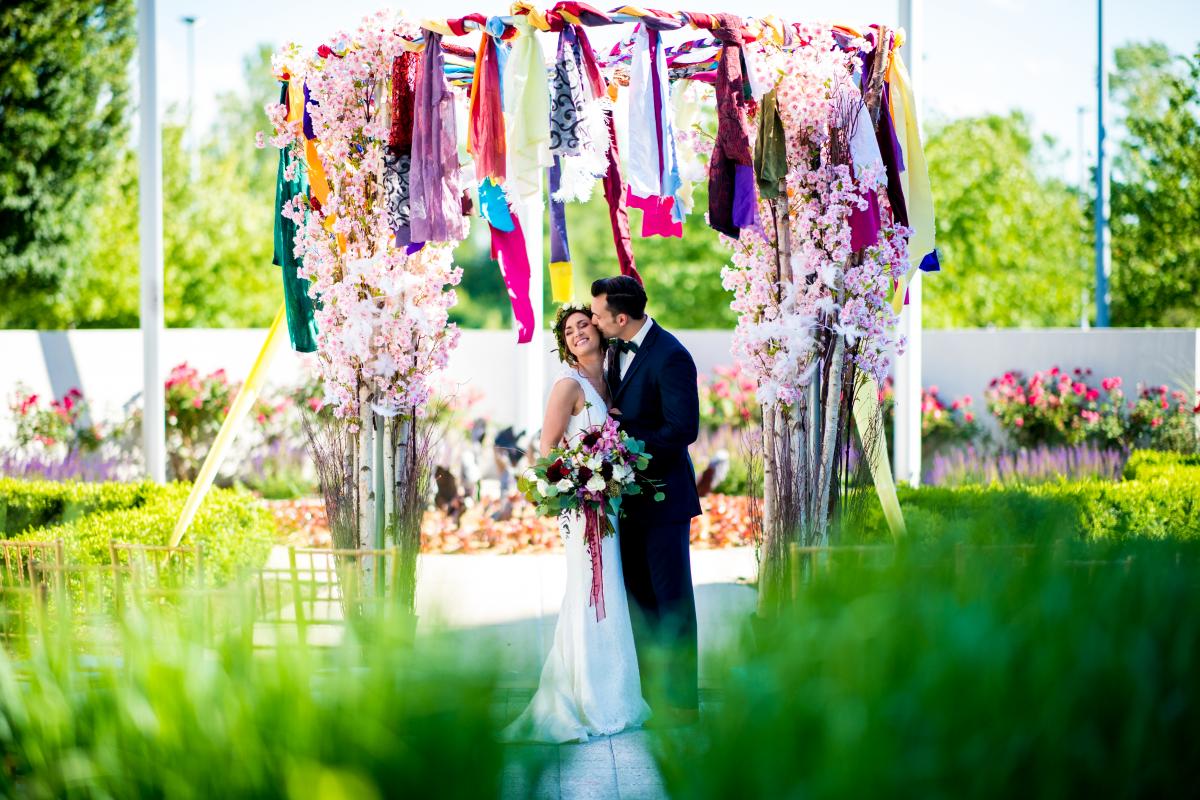
The Significance of Crafting a Chuppah
A chuppah represents the shelter and security your relationship will provide and the presence of the divine Name in your union. This canopy will become a sacred space where you exchange your vows and begin a new life together.
Building your chuppah contributes to the joy and sanctity of the occasion and shows that you put care and effort into preparing for your marriage. Crafting the chuppah with love and intention infuses it with significance and personal meaning.
Constructing your chuppah as a DIY project can also save you money, which you’ll appreciate if you and your fiance are among the many couples already spending around $300 per wedding guest to celebrate your nuptials. You don’t have to be woodworkers to bring your vision to life. All you need are a few tools, the required materials and straightforward instructions.
Supplies You’ll Need
After choosing your venue, measure the space where you’ll exchange vows. The height, width and length will determine the specifics of your unique chuppah. You should also understand the hardware options crucial to building secure structures, which includes essential terms like:
- Drillers
- Gold screws
- Round washers
You won’t need an entire hardware store’s inventory to make your chuppah, but learning the terminology could help if you need more structural support. Before you start, gather these materials:
- Four poles that are light enough to carry and long enough to stand on the ground
- Four metal or terra cotta pots
- An all-purpose bucket or wheelbarrow
- Four 1-inch PVC poles measuring 2 feet tall
- Four bags of quick-dry cement
- Fabric cut between 5 feet wide and 5 feet long or 8 feet wide and 8 feet long
- Paint stirring sticks
- Four screw hooks
Of course, you can customize your chuppah to match your wedding aesthetic. For example, your four long poles could be bamboo, birch, cedar, cypress or metal. They’ll be on display as much as your chuppah’s fabric, so upgrading to a more attractive material could elevate your ceremony.

Assembly Instructions
Once you have your supplies ready, it’s time to start putting it all together. Follow these instructions closely to ensure you have a structurally sound chuppah that’s also easy to transport.
1. Make Your Cement Buckets or Pots
When your wedding is a few weeks away, get your selected buckets or pots and short PVC pipes out. You’ll want to place them outside next to a water source like a hose. Pour one of your quick-dry cement bags into your all-purpose bucket or wheelbarrow. Add as much water as the instructions recommend, mixing with paint stirring sticks as you pour it in.
Place a 2-foot PVC pipe vertically in one of your buckets or pots. They should sit in the middle to hold your eventual poles. Pour the concrete around the PVC pipe until the container only has two to three inches of clearance at the top. Repeat with your other three pots or buckets.
The concrete’s weight will secure your chuppah and fortify it against potential winds. Consider moving it outside after your ceremony to shelter your cornhole supplies or bonfire snacks. Your chuppah can double as reception decor if it’s stable with weighted foundation containers.
2. Prepare Your Long Poles
Check your long poles after your cement buckets dry. Clean each one so it looks presentable and ready for your wedding. If you choose hardwood poles, a stiff-bristled brush will loosen dirt from the grain without leaving scratches.
When your poles look picture-perfect, stand them in the 1-inch PVC pipes inside your cement foundation containers. They should slide into the pipes easily — not too loose, while still able to stand on their own. Remove them when you feel satisfied that they’ll hold — you’ll need to place them flat in a vehicle alongside your concrete buckets when it’s time to transport them to your venue.
3. Store Everything Together
The days before your wedding might pass in a happy blur. Prevent mishaps by storing all your chuppah parts in one area. You don’t want to send anyone rushing back home to pick up forgotten supplies in the hours leading up to your ceremony. You’ll also get a better idea of what your chuppah might look like when you put everything together.
4. Assemble the Chuppah at the Altar
Ask your venue coordinator when you can arrive to set up your chuppah. You’ll need to carry your cement containers to your ceremony space, plus your pipes, the fabric, screw hooks and chosen decor like silk flowers or moss.
Slide the eight-foot poles into the PVC pipes within your concrete containers. When they’re secure, turn the screw hooks into the top of each pole. The hooks should face inward and up. You’ll need to place the corners of your fabric over each hook, which may involve piercing the material. If you opted for a larger bolt of fabric, it can drape over the four poles and secure itself with screw hooks facing out.
5. Add Optional Decorative Elements
Once you’ve secured your chuppah’s foundation, it’s time to decorate. You could cover the cement buckets with rocks, flowers, moss or anything else that matches your wedding theme. If you’re using silver or gold buckets as reception flower holders, they should match your chuppah to create a visually cohesive ceremony.
Make Your Wedding Dreams Come True
Building a chuppah shouldn’t feel intimidating amid everything else you’re doing to plan an unforgettable wedding. Get the few materials you need, match them to your ceremony aesthetic and prep the concrete containers a few weeks before your big day. You’ll put it together in minutes and have a beautiful, traditional place to exchange your vows.

Author Bio: Oscar Collins is the editor-in-chief at Modded, where he writes about a broad spectrum of topics. Follow him on Twitter @TModded for frequent updates on his work.
are you a bride or groom-to-be?
We'd love to plan with you on weddingday-online.com. Let's get started!
are you a wedding extraordinaire?
Join WeddingDay Magazine in inspiring brides by partnering with us! See how here.

Garden Whimsy Wedding
Kaitlyn Smale | February 20, 2026
A Michigan Art-Deco Shoot
Allyson Hutchison | August 12, 2025
Grand Rapids Cover Shoot
Kaitlyn Smale | January 30, 2026
A Boho Michigan Wedding
Allyson Hutchison | January 21, 2026
A Modern Ohio Wedding
Allyson Hutchison | April 23, 2026
Join the conversation
Log in or register to post comments